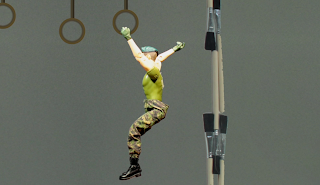
After the end of the project I feel that while I was able to complete the brief, it seems that if I had more time to work on it I would have been able to produce some higher quality animations. Having to balance the project along with a Music Video and another Character project proved to be quite difficult.
However I feel that it has helped teach me more about hand drawn animation - as it has never been one of my strong forms of animation I saw this project as a good opportunity to give it a try. I have decided after doing this project that I prefer doing Stop Motion Animation and will use this form more often in future.
Overall I am pleased with the result of this project. It has taught me many things which I will hopefully be able to use in future projects. While the work balancing became difficult at times it has also taught me to schedule my work time more evenly than before. It was a very interesting project and I look forward to starting the next.
Alex Crowley
Advanced Animation
Monday, 26 November 2012
Part 3: Obstacle Course
To begin with I planned to use After Effects to animate my character running and interacting with various obstacles. I created a fully pose-able overweight man using Photoshop and imported it into an After Effects document to see how things would work.
Photoshop Wireframe Man
I recreated the overweight character in 2d and planned on animating it in a similar way - by rotating the limbs and head around the torso in front of a blue screen.
Plasticine Overweight Man
Armature
I was very nearly ready to begin animating using this (wearing action man clothes) when I discovered that the limbs became loose very easily due to the parts of the armature being overused. In the end I decided on using an actual Action Man figure, attached to a rig.
Animation Set Up
Unfortunately due to a lack of a real rig I had to create a makeshift rig using a stand, a camera clamp and a custom made metal rod which had to be glued to the back of the action man.
The glue came unstuck countless times and reapplying the glue actually became more time consuming than the actual animation but despite the issues I was still able to complete my obstacle course in time with some smooth animation. The backgrounds were intended to look like they were home made from other small objects such as paintbrushes and plasticine blocks and were added in using After Effects.
Frame of Finished Obstacle Course
Part 2: Lift Push Pull
Lifting Reference
Frame from Lifting Animation
Pulling Reference
Frame from Pulling Animation
Pushing Reference
Frame from Pushing Animation
I am fairly pleased with the results of these three tests. Unfortunately I had to redo the Pushing Animation from scratch using a different reference as the previous one did not translate into animation too well, but the newer version is a vast improvement.
Frame from Pushing Animation (Outdated)
I feel that I learned a lot from these exercises as they helped me to understand movement and also when to over-exaggerate movements in 2d animation.
Part 1: Horses
To begin with we looked at a small skeleton of a four legged creature as a way to help us familiarise ourselves with how quadruped animals are structured.
After studying the creature for a short while I drew a quick sketch of the skeleton, hoping it will give me an understanding as to how quadrupeds are built and a basic idea of how they might move.
After studying the creature for a short while I drew a quick sketch of the skeleton, hoping it will give me an understanding as to how quadrupeds are built and a basic idea of how they might move.
Skeleton Sketch
I then went on to attempting to animate a horse walk cycle. I was able to find some of Eadweard Muybridge's original animal movement photos, edited into full working videos, dating all the way back to the 1870's. Using these I was able to make my very first Horse walk cycle.
Used from http://sillydragon.com/muybridge/Plate_0576.html
Shot from my Horse Walk Cycle
After animating the walk cycle and being reasonably pleased with it, I moved onto the next step and started looking for a good piece of Muybridge footage that I could use for a run cycle.
http://sillydragon.com/muybridge/Plate_0632.html
Shot from my Horse Run Cycle
I flipped the image using photoshop as I found after animating the walk cycle that I was more accustomed to animating a horse facing right and began working on the run cycle. I decided to spend less time on the shading and details as the motion is considered more important for this brief. I found that it in fact works better than the walk cycle I had made as it looks more "complete".
Since shooting the original photos I have gone back to edit them using After Effects as a way to reduce the "click" when the frames loop. This has worked mostly but the walk cycle still has a couple of issues that I was unable to resolve due to time restraints.
Subscribe to:
Comments (Atom)


